Making a Minky Baby Blanket Without a Sewing Machine
Larn how to make a soft & snuggly baby receiving coating with this free Flannel and Minky Blanket Sewing tutorial! This Minky blanket is easy to sew and simply takes a niggling over a yard of Minky material!
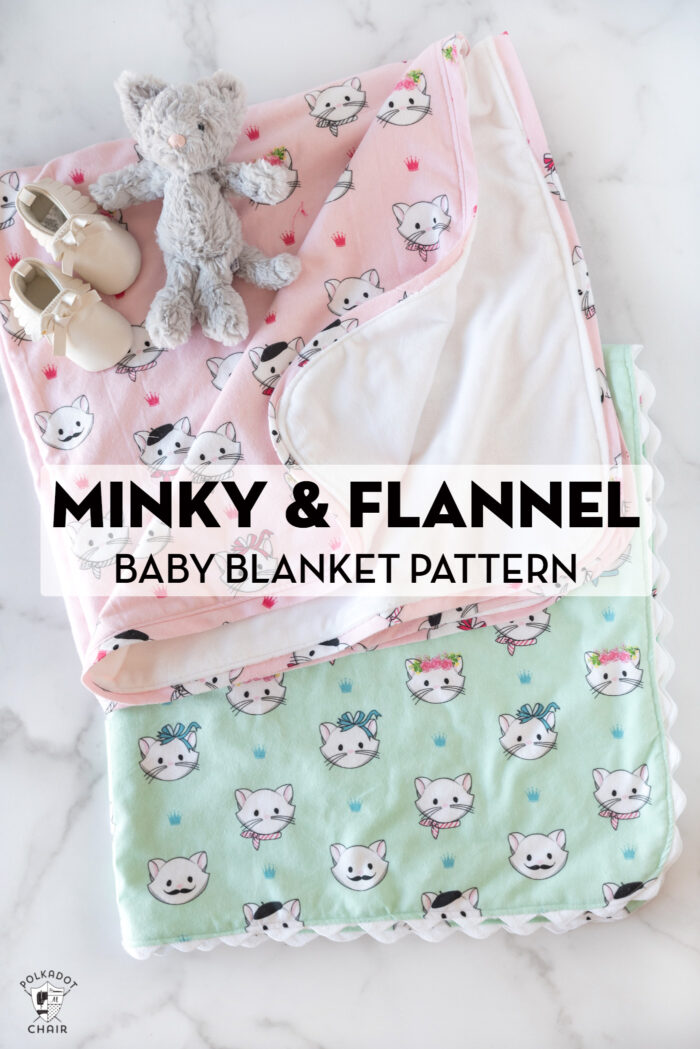
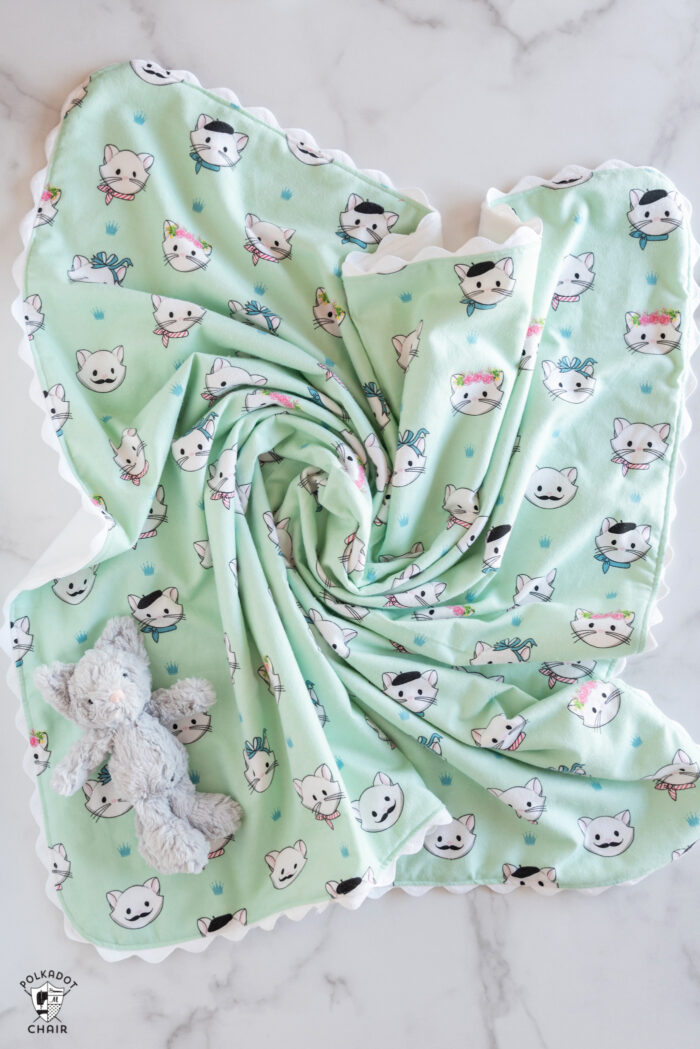
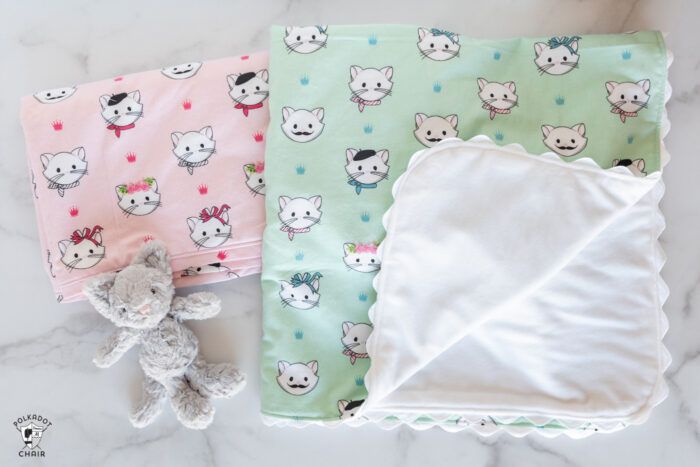
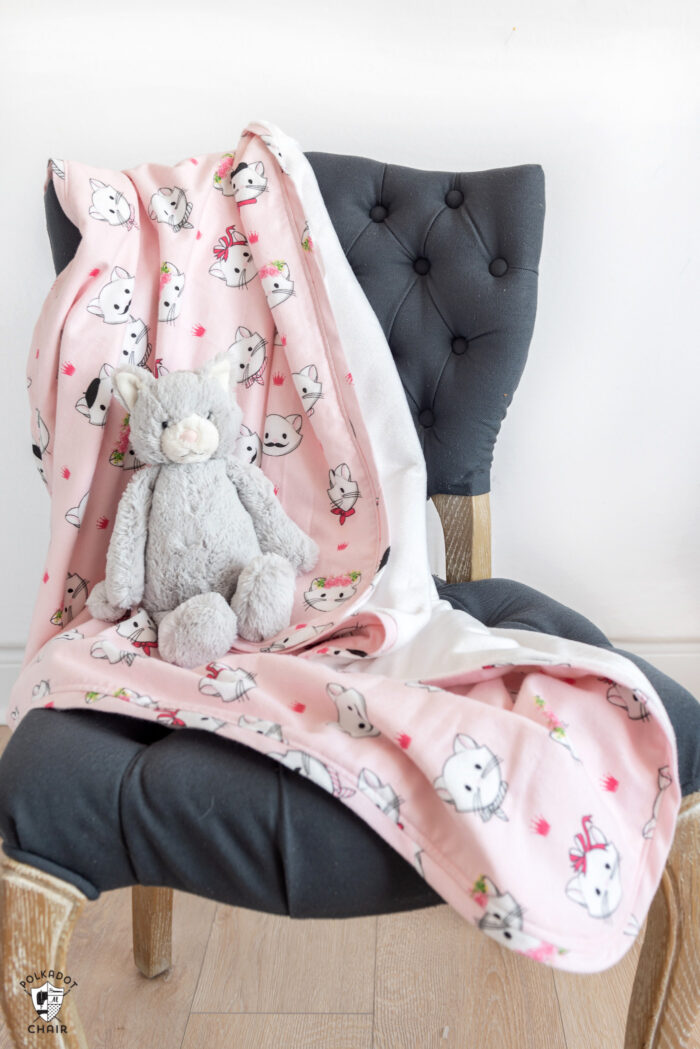
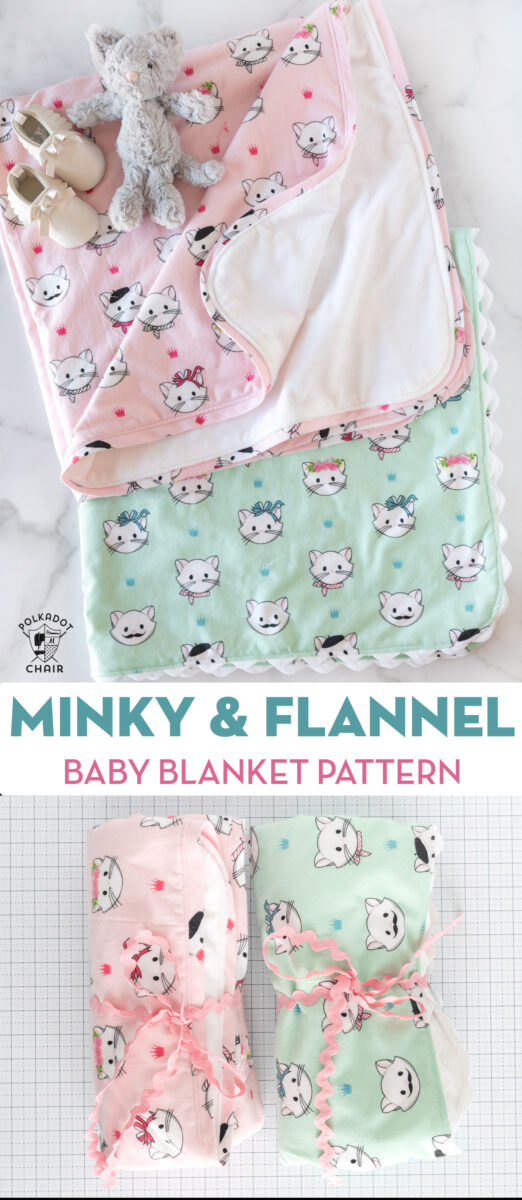
Today I'm going to show you how to make the easiest, most cozy baby blanket. It'due south then soft that you're going to want to make a large one for yourself! This blanket features i layer of flannel textile and one layer of Minky fabric. The blankets likewise feature a flake of decorative edge trim.
Table of Contents
- Is it Hard to Sew a Baby Coating?
- Baby Blanket Size
- Nigh the Sewing Blueprint
- A few tips for working with Minky Fabric
- Can I Make the Blanket Larger?
- Do you Need to Use Batting with Minky?
- Exercise I need to Pre-Wash the Fabrics?
- Minky Infant Coating Supplies
- Video Instructions
- Instructions
These blankets make splendid baby shower gifts because they are economic (you merely need a little over a m of each fabric), simple, and easily customized to your recipient.
Is it Hard to Run up a Baby Blanket?
No, it'southward pretty uncomplicated really; the entire project is just iv directly seams!
One of the EASIEST ways to stitch a blanket for a baby is to take two pieces of fabric, cut them into a square, sew them right sides together (leaving a small opening), and turn them right side out. Voila, an Easy infant blanket. In that location's a bit more than to it than that, but you lot go a general idea.
I of the biggest problems with a simple sew and flip baby blanket is getting straight sides on the coating. You have to press your seam open up earlier you turn the blanket right side out, and fifty-fifty and so, the edge is sometimes wonky. I've made many baby blankets using that method and always find myself frustrated at the end.

I have plant that if yous insert a scrap of trim or cloth into the seam before yous sew the coating, non but does information technology wait nicer, but information technology's easier to stitch since the trim gives you something to pull when you plough the blanket correct side out—making it MUCH easier to go a make clean side seam.
I've been making baby blankets this manner for years! I don't know why it has taken me so long to write a tutorial.
Baby Coating Size
These babe blankets measure approximately 39″ x 39″ when finished.
Creating a coating makes the near of the width of fabric (nearly flannel is xl″-44″ wide), leaving you with as little waste matter as possible. You can make them larger if you adopt, merely you lot'll need to slice the flannel textile to get a larger slice of fabric.
About the Sewing Design
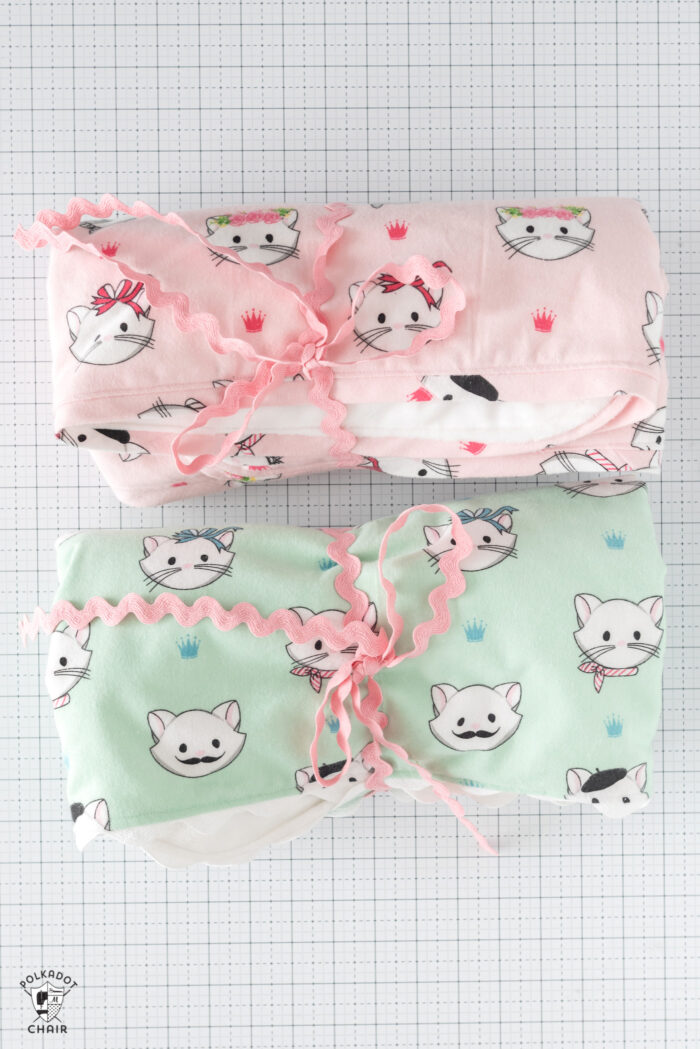
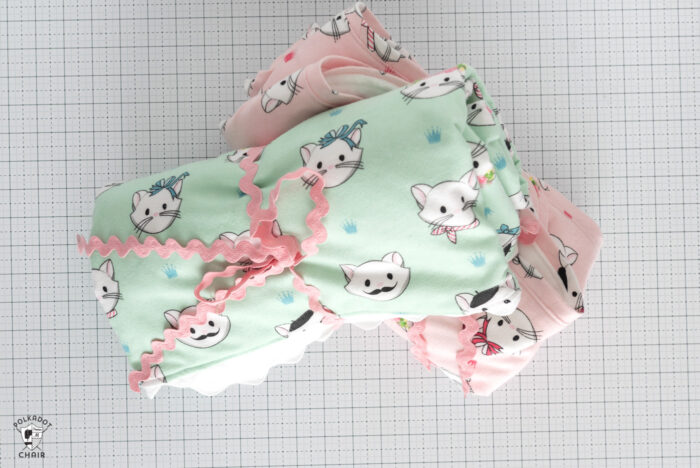
Instructions are included to brand a Minky babe blanket with either a bias flange edge or a ric-rac edge. I prefer the ric-rac, but I know that some prefer the more modern look of a simple fabric edge.
The construction method for both is substantially the same, and y'all will need to brand bias trim for the blanket with the flange (the pink 1 in our tutorial).
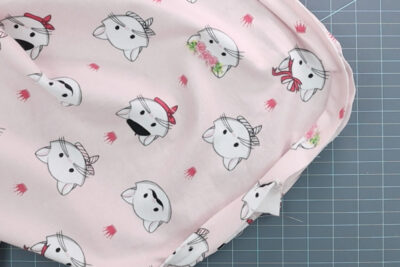
One side of this coating is flannel (the print is from my Chloe & Friends cloth collection), and the other side is Minky, making this blanket SUPER SOFT!
A few tips for working with Minky Material
- Cut Minky cloth with a Rotary tool. I recommend a rotary tool with a 45mm blade. if the minky you're working with is very thick, you may need to become upwardly to the 60mm bract.
- Minky textile is messy when information technology'south cut. That's just how it is. Instead of trying to avoid the mess, just plan effectually it and keep a lint roller close by. If you feel in that location is an excessive amount of "fuzz" merely launder & dry the fabric.
- Use a lot of pins! Normally I'thousand not one who pins much every bit I sew. Nonetheless, when I sew with minky fabric I am careful to pin every i″ of seam. When you're going effectually corners you may need to pin every ½″.
- When sewing minky and another fabric, always take the minky fabric closest to the feed dogs of the sewing machine. The feed dogs (those piffling metal plates nether your presser foot), will assistance to evenly feed the fabric as you run up.
- Use a walking pes. A walking human foot is a presser human foot that attaches to your sewing machine that "walks" over your fabric. I use a walking foot anytime I'm sewing multiple layers of fabric together or whatever thick fabrics.
- A slightly longer stitch length will help your textile feed evenly. I recommend a 3. If information technology's too much smaller the material may just bunch up as you run up and you will be left with very tiny stitches.
- Try using a Stretch Needle. Personally, I sew together with a Universal ninety/14 needle and have been fine. Still, alot of sewing is machine specific and your machine may exist "happier" sewing minky material with a stretch needle. I usually utilize a 90/14.
Can I Make the Blanket Larger?
Yes, you can make it any size you desire. But you'll need to practice a bit of math. Flannel cloth is about 42″ wide. Information technology needs to be prewashed and volition shrink. To make a blanket larger than 40″ in one management, you lot'll demand to run up two pieces of flannel together. Most Minky fabric is 60″ wide. If you want a blanket larger than sixty″ ten threescore″, you'll also demand to sew together two pieces of Minky together.
Do you Demand to Employ Batting with Minky?
I am not using batting since this is a babe blanket and not a quilt. However, when I brand a quilt with Minky batting, I use lightweight cotton batting.
Do I need to Pre-Wash the Fabrics?
In this case, yes. Since the Minky does not shrink (or will not shrink much), and the flannel does shrink, y'all'll need to prewash and dry both pieces of material before you cut. This will ensure that the coating remains the correct size after it's completed and washed.
Minky Baby Blanket Supplies
- i ¼ yards of Minky Fabric
- ane ¼ yards of Flannel Fabric
- 4 Yards Jumbo Ric Rack Trim OR
- ½ g Flannel (for bias flange)
- Long striaght pins
Recommended just not required.
Walking Foot for Sewing Car
Video Instructions
Nosotros've created a video outlining all the steps in the construction process. You tin find it in the commodity below or on our YouTube channel.
Instructions
Flannel and Minky Baby Blanket Blueprint
Larn how to sew a simple flannel and Minky coating. This blueprint is beginner-friendly and makes a corking infant gift.
Yield: ane blanket
- 1 ¼ One thousand Minky Material
- one ¼ Grand Flannel Fabric Print is from the Chole & Friends Collection by Riley Blake Designs
- 4 Yards Ric-Rac Trim; Jumbo OR
- ½ Yard Flannel you do non need an extra ½ thou of flannel if you are making the coating with ric-rac trim.
Training
-
Pre-wash and tumble dry out all fabrics earlier cut.
Cutting
-
Cutting the flannel cloth to forty" 10 40".
Cut the Minky fabric to approximately 42" x 42"; this does not demand to be an exact cut. You volition cutting the Minky once more in a afterwards footstep.
-
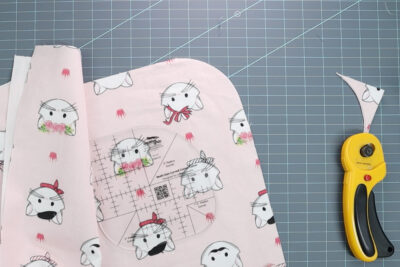
Using a Curved Corner Ruler or a round plate, curve all 4 corners of your 40" 10 forty" piece of flannel fabric.

-
To do this, I like to fold my cloth in one-half and bend two corners at one time.
Create Bias Trim
-
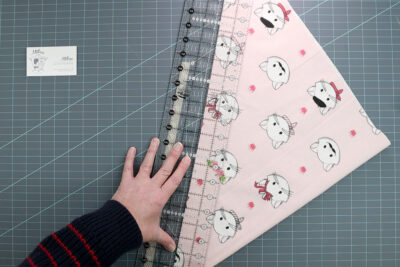
If you are making the coating with a fabric flange, cut your ½ yard of fabric into two" bias strips.
To cutting cloth on the bias, line the fold or selvage edge of the material upward with the 45-degree mark on your quilt ruler. Make a single cut.
-
Then sub-cut along the same angle strips two" wide.
You lot will need approximately 130" total inches of cut bias. I cut most of my ½ yard of material and had plenty of fabric.
-
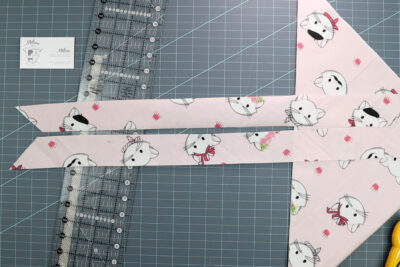
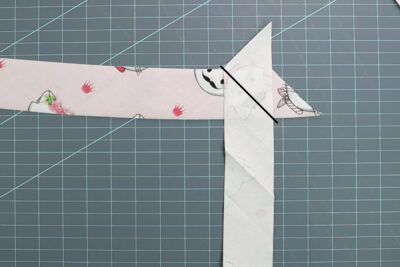
Run up the bias strips together at a 45" caste angle. Trim the backlog seam allowance.
-
Press the bias fabric in half lengthwise, incorrect sides facing.
Sew Bias to Flannel
-
Place the folded bias along the right side of the border of the 40" flannel slice of fabric. The raw edge of the flannel slice will be even with the raw edge of the bias.
-
Stitch the bias to the flannel using a ½" seam allowance. Exist sure to pin the bias well effectually the curves so that you get a shine edge.
-
When yous get back to where y'all started, join the bias ends.
Ric-Rac Instructions
-
To make the babe blanket with ric-rac trim, pin the ric-rac trim to the exterior edge of the right side of the twoscore" piece of flannel.
The border of the ric-rac should exist even with the edge of the textile.

-
Sew the ric-rac to the flannel by sewing in the middle of the ric-rac. Finish the ends of the ric-rac with a bit of Fray Check.
Associates
-
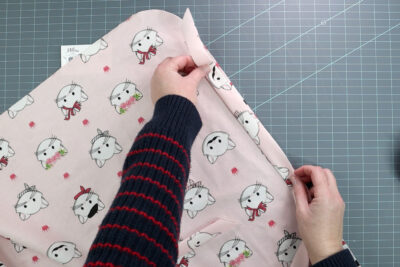
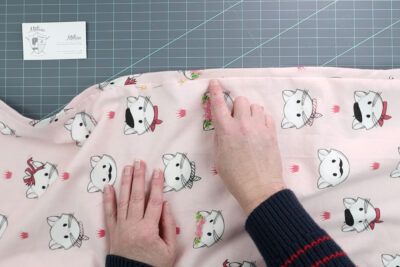
Lay the Minky fabric piece on the floor right side upwards. Lay the sewn piece of flannel on top of the Minky right side downwardly. Take care to smooth out any wrinkles in the two fabrics.
-
Pivot the perimeter of the blanket VERY VERY well. Yous will want to identify a pivot at least every 1".

-
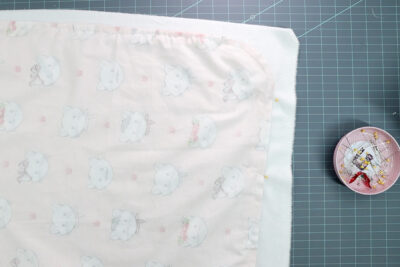
Motility the pinned fabric to your sewing machine. Sew the Minky to the flannel with the flannel side upwardly.
Stitch on meridian of the Aforementioned seam you lot created when y'all stitched the ric rack or bias to the flannel slice.
Leave an 8" opening on one side of the blanket.
Finishing
-
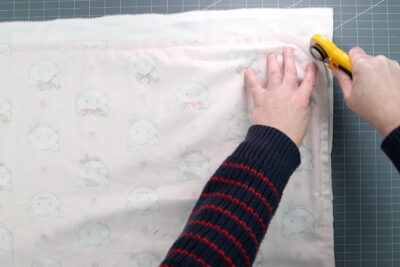
Trim any excess Minky fabric from the seam allowance using big pair of scissors or a rotary cutter.
-
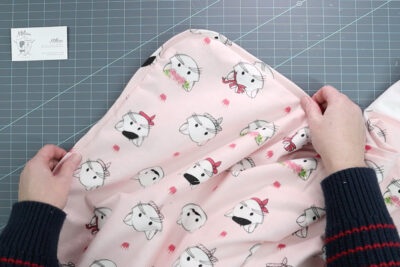
Turn the coating right side out through the opening y'all left in the seam.
Printing the edge of the blanket well (you may demand to use a pressing cloth with sure types of Minky, be sure to exam information technology first).
Tug on the trim gently to ensure that you have a nice, crisp edge on your blanket.
-
Using pins, close the opening in the coating.
-
Topstitch the entire perimeter of the blanket, making sure to close the opening as you run up.
Copyright Observe
©www.polkadotchair.com – This is Copyrighted Content. Yous may Not copy information technology, distribute it, sell it or package it with a kit. You may Non teach a for-fee form using it. All items are for personal utilize only. No commercial utilize is allowed.
More Infant Coating Sewing Patterns
Patchwork Minky Self Binding Baby Blanket Pattern
Knit Baby Coating Blueprint
Upcycled T-Shirt Infant Blanket Pattern
Source: https://www.polkadotchair.com/how-to-make-a-flannel-and-minky-baby-blanket/
0 Response to "Making a Minky Baby Blanket Without a Sewing Machine"
Postar um comentário